Open the door fully to access both sides of the knob and latch.
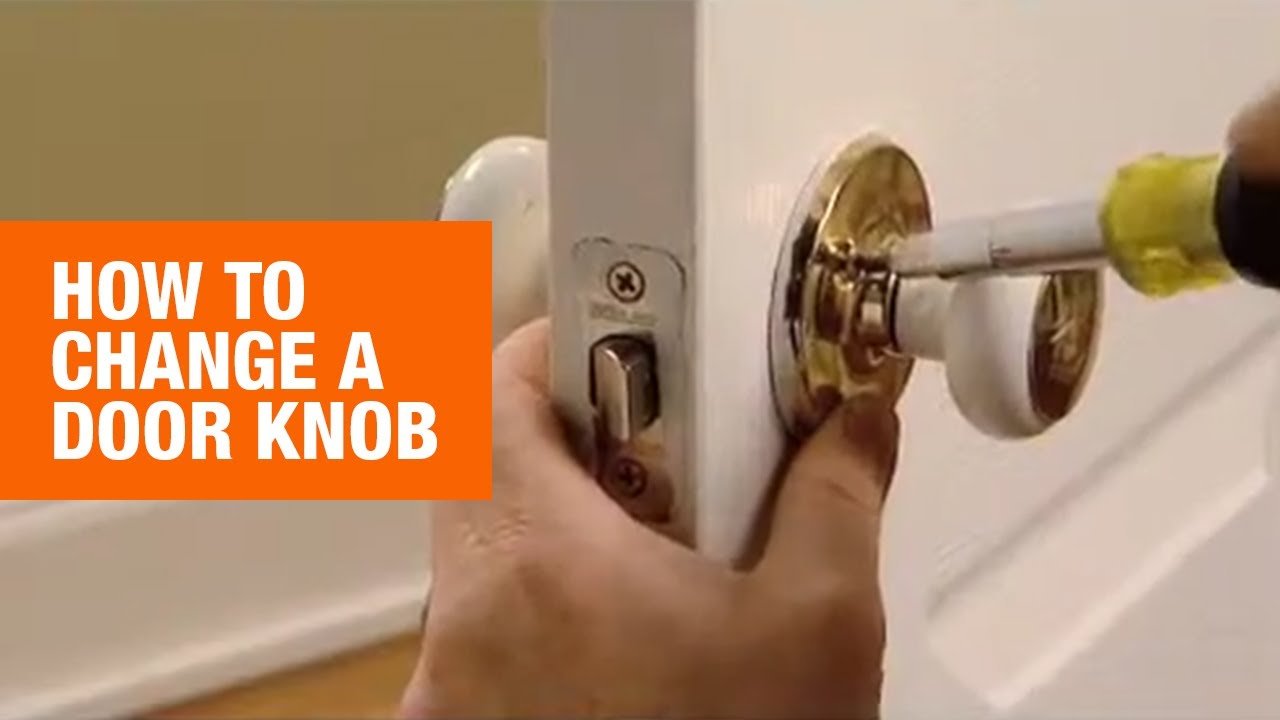
Use a Phillips screwdriver to remove the screws from the interior knob plate.
Pull both the interior and exterior knobs out of the door.
Unscrew the latch plate on the edge of the door and remove the latch mechanism.
Insert the new latch into the edge of the door, ensuring the beveled side faces the correct direction.
Secure the new latch with the provided screws using a Phillips screwdriver.
Align the exterior knob with the latch mechanism and insert it through the hole.
Attach the interior knob by aligning it with the spindle and pushing it into place.
Tighten the screws on the interior knob plate to secure both knobs.
Turn the knob and check that the latch retracts and extends smoothly.
Close the door and test the latch alignment with the strike plate.
If needed, adjust the strike plate by loosening screws and repositioning it.
Tighten the strike plate screws once the latch aligns properly.
Fill any old screw holes or gaps with wood filler if the new knob doesn't cover them.
Let the filler dry and touch up with paint if desired.
Ensure all screws are tight and the knob feels secure.
Check that the lock mechanism (if present) functions correctly.
Wipe down the new knob and surrounding area to remove fingerprints or debris.
Dispose of the old knob and packaging responsibly.
Store tools properly and ensure the door operates smoothly.