Measure the top and side lengths of the door frame using a tape measure.
Mark the trim pieces according to your measurements with a pencil.
Use a miter saw to cut the trim ends at 45-degree angles for clean corners.
Dry fit the trim pieces around the door to ensure proper alignment.
Apply construction adhesive to the back of each trim piece for extra hold.
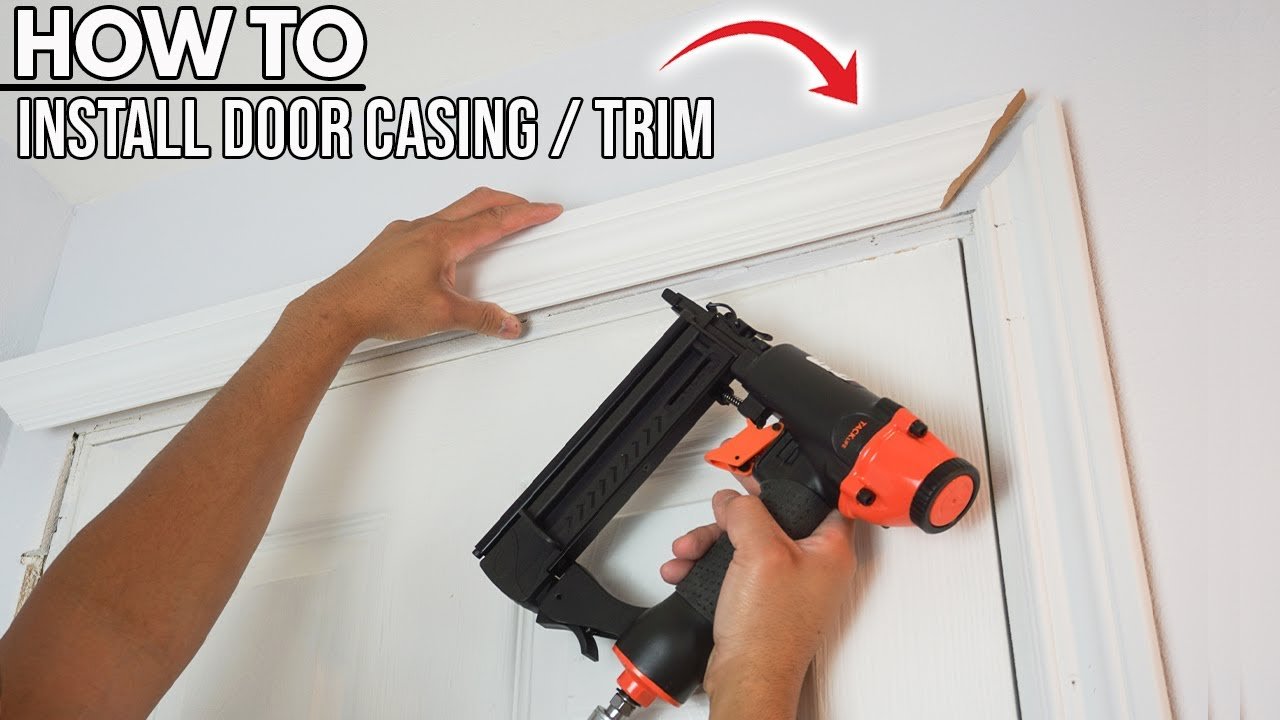
Position the top trim piece first and secure it using a nail gun.
Install the side trim pieces, checking that they align with the top trim.
Use a level to ensure each trim piece is straight before nailing fully.
Nail the trim into place, spacing nails evenly and avoiding overdriving.
Tap in any protruding nails with a hammer and nail set if needed.
Fill nail holes and any small gaps with wood filler using a putty knife.
Allow the wood filler to dry completely according to product instructions.
Apply painter’s caulk along the edges where trim meets the wall.
Smooth the caulk with a damp finger or caulking tool for a clean finish.
Let the caulk dry fully before proceeding to the next step.
Lightly sand the filled areas to create a smooth surface for painting.
Wipe down the trim to remove any dust or debris before finishing.
Apply paint or stain to the trim using a brush or roller as desired.
Allow the finish to dry completely before using the door area.
Inspect the trim for any touch-ups or additional caulking needed.