How to replace a light switch

Check out your helpful results below!
Jump to a section or preview what’s included.
Jump to:
Scroll for the full guide ↓
  • 🎥 A step-by-step video walkthrough
  • 🧰 A tools & supplies checklist
  • 📋 Clear step-by-step instructions
  • ⚠️ Safety notes + pro tips
  • 🧑‍🔧 Optional help from a local pro

Video

Don't Let This Be You

Estimated Time:

Difficulty:

Tools

    Materials

      Steps

        Safety Notes

          Pro Tips

            Did this tutorial help?

            Send me this Do It Yourself tutorial via email

            YouTube thumbnail SW2MhGwmWiY

            Need help from a local pro?

            Get free quotes for this job without leaving DIY4UAI.

            Get free quotes

            Screwdriver (flathead and Phillips), Voltage tester, Wire stripper, Needle-nose pliers
            Always turn off power at the breaker before working on electrical components., Use a voltage tester to confirm no electricity is present before touching wires., Do not work on electrical systems in wet or damp conditions., Wear insulated gloves if unsure about wiring safety.
            Turn off the power to the switch at the circuit breaker to prevent electrical shock. Use a voltage tester to confirm the power is off before touching any wires. Remove the switch cover plate using a flathead screwdriver. 
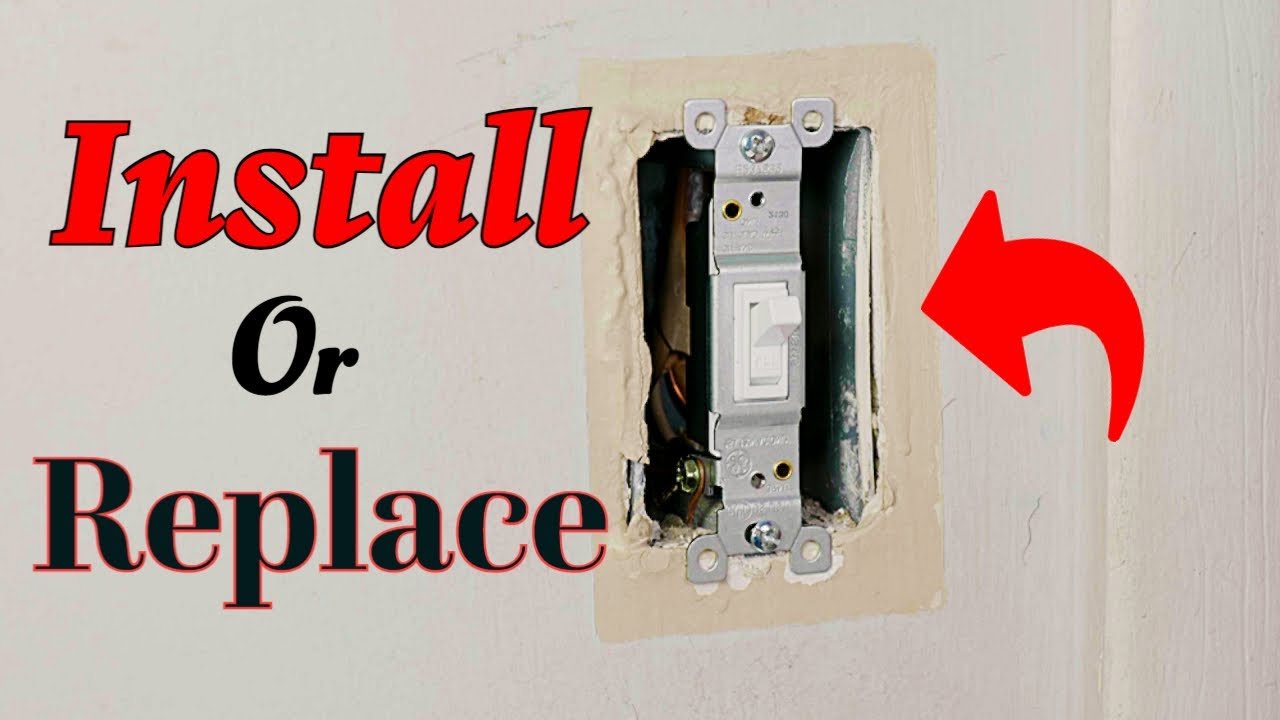
Unscrew the mounting screws holding the old switch in place and gently pull it out. Take note of how the wires are connected to the old switch or take a photo for reference. Use a screwdriver to loosen the terminal screws and disconnect the wires from the old switch. If needed, strip about 1/2 inch of insulation from the wire ends using a wire stripper. Connect the wires to the new switch, matching the same configuration as the old one. Tighten the terminal screws securely to ensure a solid connection. Wrap electrical tape around the terminals for added safety if desired. Carefully push the wires back into the electrical box. Align the new switch and secure it to the box with the mounting screws. Reattach the switch cover plate and tighten the screws. Turn the power back on at the circuit breaker. Test the new switch to ensure it turns the light on and off properly. If the switch does not work, turn off power and double-check wire connections. Ensure the switch is flush with the wall and the plate is not pinching any wires. Dispose of the old switch properly according to local regulations.
            New light switch, Electrical tape, Wire nuts
            Medium
            Label wires with tape before disconnecting to avoid confusion., Take a photo of the old switch wiring for easy reference., Use a switch with a built-in light if replacing in a dark area., Check local codes if installing a dimmer or specialty switch.
            30
            https://www.youtube.com/watch?v=SW2MhGwmWiY