How to Fix a Water-Damaged Exterior Wall Crack

Check out your helpful results below!
Jump to a section or preview what’s included.
Jump to:
Scroll for the full guide ↓
  • 🎥 A step-by-step video walkthrough
  • 🧰 A tools & supplies checklist
  • 📋 Clear step-by-step instructions
  • ⚠️ Safety notes + pro tips
  • 🧑‍🔧 Optional help from a local pro

Video

Don't Let This Be You

Estimated Time:

Difficulty:

Tools

    Materials

      Steps

        Safety Notes

          Pro Tips

            Did this tutorial help?

            Send me this Do It Yourself tutorial via email

            YouTube thumbnail CvFMktwEvfw

            Need help from a local pro?

            Get free quotes for this job without leaving DIY4UAI.

            Get free quotes

            Putty knife, Wire brush, Utility knife, Caulking gun, Paintbrush, Sandpaper, Bucket, Sponge, Ladder, Protective gloves
            Wear gloves and eye protection when handling chemicals or sanding., Ensure the ladder is stable and on level ground when working at height., Allow all surfaces to dry completely to prevent mold growth., Use a dust mask when sanding to avoid inhaling particles.
            Inspect the wall to locate all cracks and signs of water damage. Use a sponge and cleaning solution to scrub dirt, mold, and debris from the wall. Scrape away loose or flaking paint and damaged material with a putty knife. Use a wire brush to remove any remaining loose particles from the crack area. Allow the wall to dry completely before proceeding to prevent trapping moisture. Use a utility knife to widen hairline cracks slightly for better filler adhesion. 
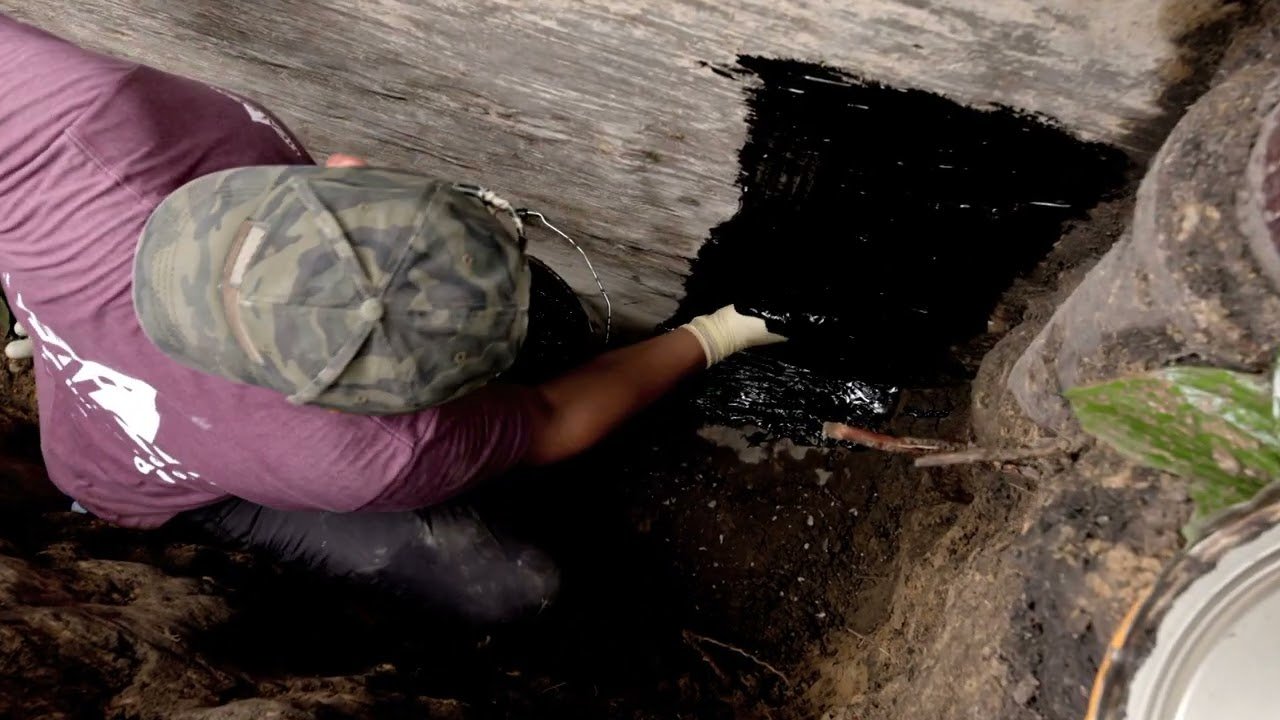
Apply exterior-grade filler into the crack using a putty knife, pressing firmly. Smooth the filler surface with the putty knife to match the surrounding wall. Let the filler cure fully as per the product instructions before sanding. Sand the patched area lightly to create a smooth, even surface. Wipe away dust with a damp cloth and allow the area to dry again. Apply a coat of exterior primer over the patched area using a paintbrush. Let the primer dry completely before applying caulk or paint. Use a caulking gun to apply waterproof exterior caulk to any remaining gaps. Smooth the caulk with a damp finger or caulk tool for a clean finish. Allow the caulk to cure fully according to manufacturer directions. Paint the repaired area with exterior masonry or stucco paint to match. Apply a second coat of paint if needed for full coverage. Once dry, apply a sealant over the area to protect against future water damage. Clean all tools and dispose of any waste materials properly.
            Exterior-grade filler or patching compound, Waterproof exterior caulk, Masonry or stucco paint, Primer, Sealant, Cleaning solution
            Medium
            Work on a dry day to ensure proper curing of filler and paint., Use a filler that matches the wall texture for a seamless repair., Prime the entire area around the patch for better paint blending., Check for underlying water leaks before sealing the wall.
            240
            https://www.youtube.com/watch?v=CvFMktwEvfw