Turn off the water supply valves under the sink and verify water is off by opening the faucet.
Place a towel or rag in the sink and plug the drain to prevent losing small parts.
Use a screwdriver or Allen wrench to remove the screw securing the faucet handle.
Gently pull off the handle and set it aside in a safe place.
Inspect the cartridge or valve for wear or damage and note its orientation.
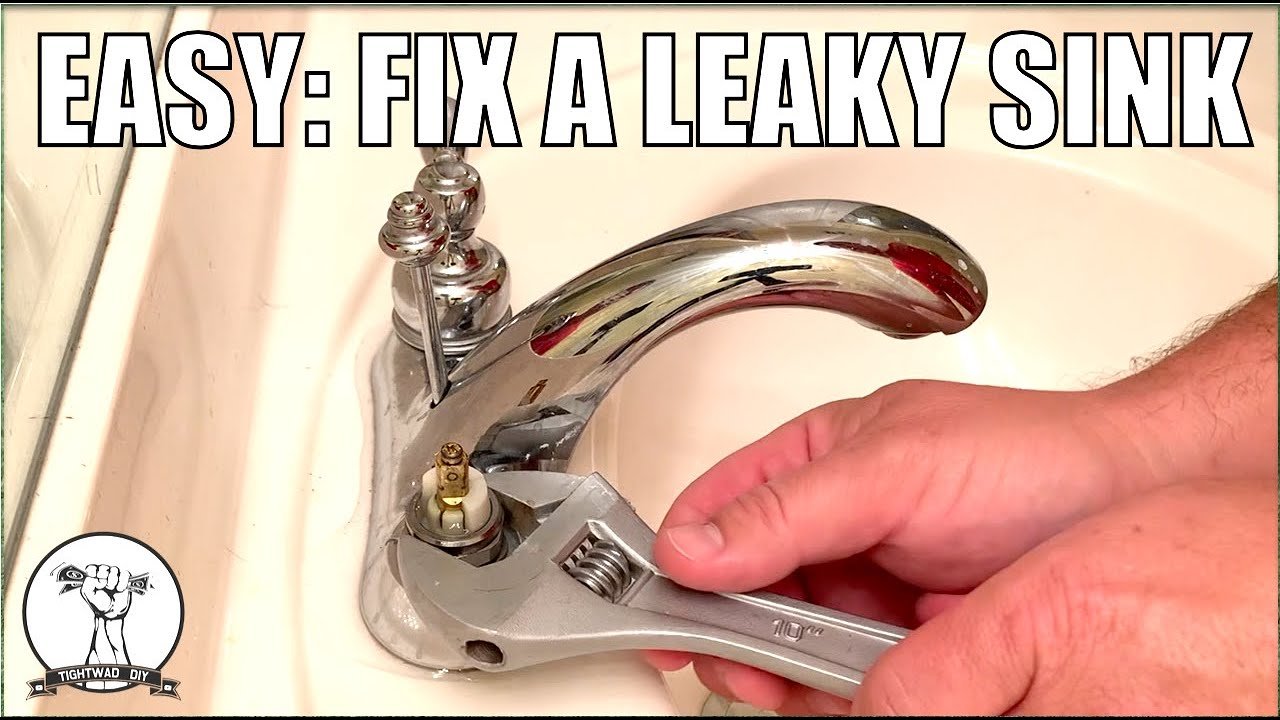
Use an adjustable wrench to loosen and remove the cartridge or valve from the faucet body.
Check for worn or cracked O-rings and seals around the cartridge or valve.
Remove old O-rings and clean the area thoroughly with a rag.
Apply a small amount of plumber's grease to the new O-rings before installing them.
Install new O-rings and ensure they are seated properly in their grooves.
Insert the new or cleaned cartridge or valve back into the faucet body.
Tighten the cartridge or valve securely using the adjustable wrench.
Reposition the faucet handle onto the stem and align it correctly.
Secure the handle with its screw using the appropriate screwdriver or Allen wrench.
Remove the drain plug and towel from the sink.
Turn the water supply valves back on slowly and check for any leaks.
Open the faucet to release any trapped air and ensure smooth operation.
Inspect the base and handle area for signs of continued leaking.
If leaks persist, double-check O-ring placement and cartridge alignment.
Torque any fasteners to manufacturer specification if applicable.