DIY Wall String Art with Your Initial

Check out your helpful results below!
Jump to a section or preview what’s included.
Jump to:
Scroll for the full guide ↓
  • 🎥 A step-by-step video walkthrough
  • 🧰 A tools & supplies checklist
  • 📋 Clear step-by-step instructions
  • ⚠️ Safety notes + pro tips
  • 🧑‍🔧 Optional help from a local pro

Video

Don't Let This Be You

Estimated Time:

Difficulty:

Tools

    Materials

      Steps

        Safety Notes

          Pro Tips

            Did this tutorial help?

            Send me this Do It Yourself tutorial via email

            YouTube thumbnail 9079Z2UIMOE

            Need help from a local pro?

            Get free quotes for this job without leaving DIY4UAI.

            Get free quotes

            Hammer, Scissors, Pencil, Ruler
            Be cautious when using the hammer to avoid hitting fingers., Keep nails and sharp tools out of reach of children., Use eye protection if hammering near face level.
            Choose a bold font and print your initial at the desired size. Place the printed initial on the wood board and secure it with tape. Use a hammer to gently tap nails along the outline of the letter, spacing them evenly. Ensure nails are partially embedded and stable, but not fully driven in. Carefully tear away and remove the paper template from around the nails. Select your string color and tie one end securely to a starting nail. 
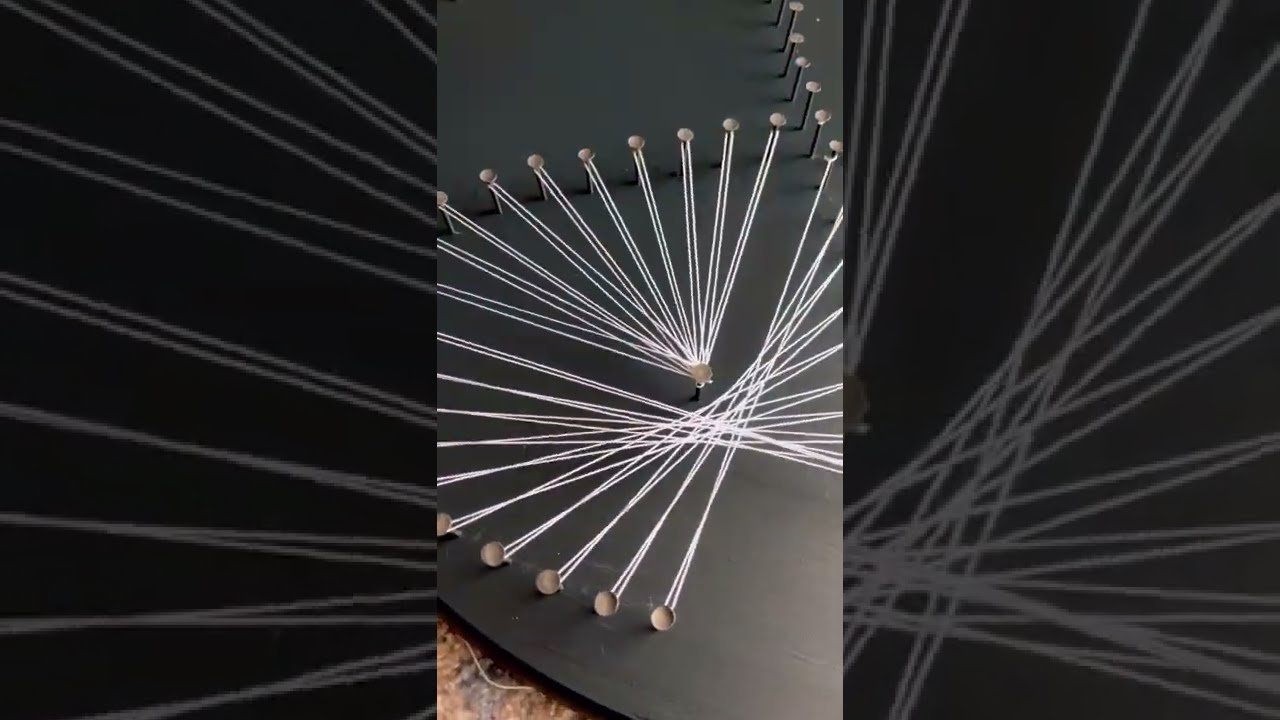
Begin wrapping the string around the nails, following the outline of the letter. Crisscross the string between nails to fill in the shape creatively. Keep string taut but not overly tight to avoid bending nails. Continue wrapping until the design looks full and balanced. Tie off the string on a nail when finished and trim the excess. Tuck or glue the knot to the back of the board for a clean look. Check for any loose nails and gently tap them back in if needed. Wipe off any pencil marks or dust from the board surface. Add a picture hanger or sawtooth hook to the back if you plan to hang it. Choose a display location and mount or lean your string art. Consider sealing the wood with a clear coat for a polished finish. Use gloves if desired to avoid string burn during wrapping. Store leftover materials for future projects or repairs.
            Wood board, Small nails, Embroidery floss or string, Printed initial template, Tape
            Medium
            Use a dark wood board for bright string colors to pop., Pre-drill small pilot holes to make nail placement easier., Mix string colors for a gradient or ombre effect., Use a clipboard or binder clip to hold string taut while tying off.
            90
            https://www.youtube.com/watch?v=9079Z2UIMOE