Install a New Radio in a 2006 Honda CRV

Check out your helpful results below!
Jump to a section or preview what’s included.
Jump to:
Scroll for the full guide ↓
  • 🎥 A step-by-step video walkthrough
  • 🧰 A tools & supplies checklist
  • 📋 Clear step-by-step instructions
  • ⚠️ Safety notes + pro tips
  • 🧑‍🔧 Optional help from a local pro

Video

Don't Let This Be You

Estimated Time:

Difficulty:

Tools

    Materials

      Steps

        Safety Notes

          Pro Tips

            Did this tutorial help?

            Send me this Do It Yourself tutorial via email

            YouTube thumbnail RkDSHL2cM58

            Need help from a local pro?

            Get free quotes for this job without leaving DIY4UAI.

            Get free quotes

            Screwdriver set, Panel removal tool, Wire stripper, Wire crimper, Electrical tape, Socket wrench set
            Always disconnect the negative battery terminal before working on electrical components., Ensure the vehicle is off and keys are removed from the ignition., Use proper tools to avoid damaging dashboard panels., Handle wiring and connectors carefully to prevent damage., Verify all connections are secure before reassembling panels., Work in a well-ventilated area and wear safety glasses if necessary., Avoid working on the vehicle in wet or damp conditions.
            Turn off the vehicle and disconnect the negative terminal of the battery to prevent electrical shorts. Use a panel removal tool to carefully pry off the dashboard trim panels surrounding the stereo area. Unscrew the mounting screws holding the factory radio in place and gently slide it out of the dashboard. Disconnect the wiring harness and antenna cable from the back of the factory radio, noting their positions. Connect the wiring harness adapter to the new stereo's wiring harness, matching color-coded wires securely with a crimper or soldering. Attach the antenna adapter to the new stereo's antenna port for proper radio reception. 
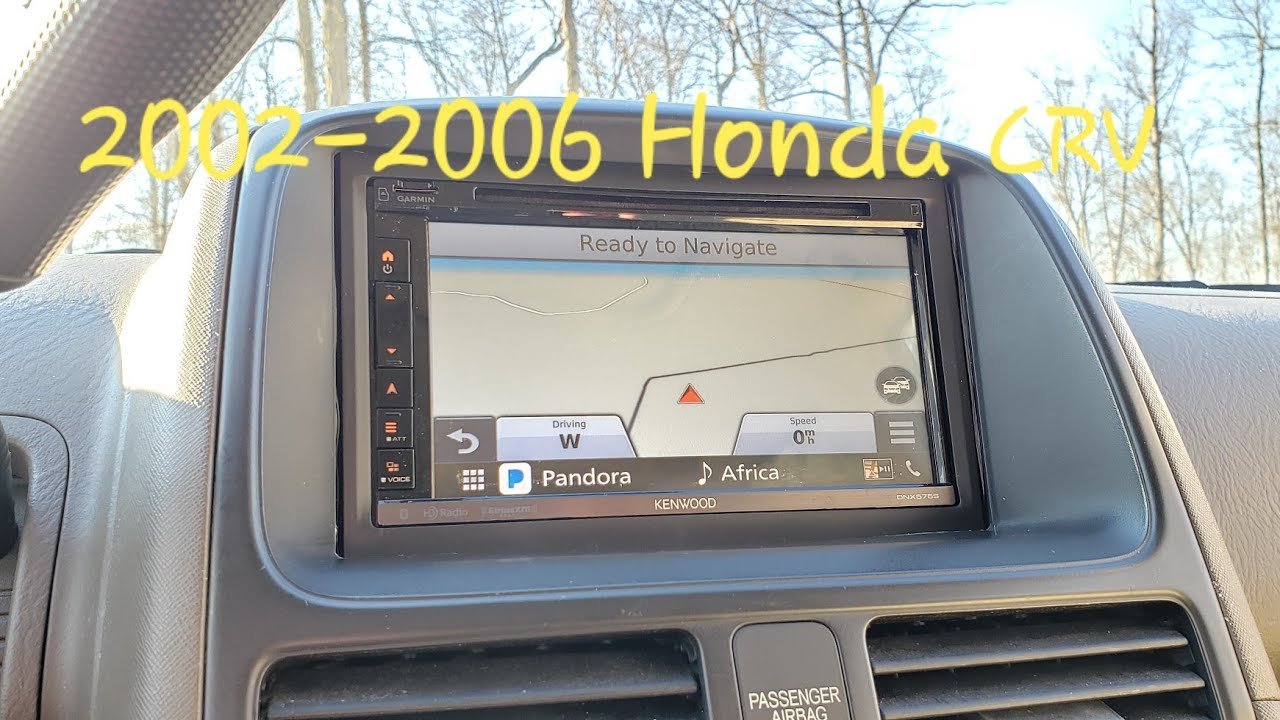
Slide the new stereo into the dash opening, ensuring the wiring is not pinched or strained. Secure the stereo with the screws removed earlier, tightening them to manufacturer specifications. Reconnect the wiring harness and antenna cable to the new stereo, ensuring firm connections. Reinstall the dashboard trim panels, snapping them back into place carefully to avoid damage. Reconnect the negative terminal of the battery and tighten the terminal clamp. Turn on the vehicle and test the new radio for sound, reception, and functionality before finalizing the installation.
            Aftermarket car stereo, Wiring harness adapter, Antenna adapter, Mounting kit, Zip ties
            Medium
            Label wires during removal to simplify reconnection., Use a wiring harness adapter for a clean installation., Test the radio before reassembling all panels., Secure loose wires with zip ties to prevent rattling., Consult your stereo's manual for specific wiring instructions., Take your time to avoid damaging dashboard clips., Consider upgrading the speakers for better sound quality.
            60
            https://www.youtube.com/watch?v=RkDSHL2cM58