Pop Up Valentines Card

Check out your helpful results below!
Jump to a section, or see what you’ll get:
Jump to:
Scroll for the full guide ↓
  • 🎥 A step-by-step video walkthrough
  • 🧰 A tools & supplies checklist
  • 📋 Clear step-by-step instructions
  • ⚠️ Safety notes + pro tips
  • 🧑‍🔧 Connections to local pros (if you want help)

Video

Don't Let This Be You

Estimated Time:

Difficulty:

Tools

    Materials

      Steps

        Safety Notes

          Pro Tips

            Did this tutorial help?

            Send me this Do It Yourself tutorial via email

            Need a pro

            Need a pro?

            Tell us what went wrong and we’ll connect you with a trusted local pro.

            Please enter your name.
            Enter a valid email.
            Enter a valid phone number.
            Enter your ZIP/postcode.
            Pick a trade.
            Tell us a bit about the issue.
            Image must be under 3 MB.
            By sending, you agree to our Terms and Privacy.
            Free quotes No spam Cancel anytime
            diy4uai21-20
            Scissors, Glue stick, Ruler, Pencil
            Use scissors carefully and cut away from your body., Supervise children when using sharp tools like scissors., Avoid inhaling glue fumes; work in a ventilated area.
            Fold a piece of colored cardstock in half to form the base of your card. Use a pencil and ruler to mark a 1-inch slit in the center of the fold. Cut along the marked line using scissors to create the pop-up tab. Push the cut section inward and crease it to form a pop-up platform. 
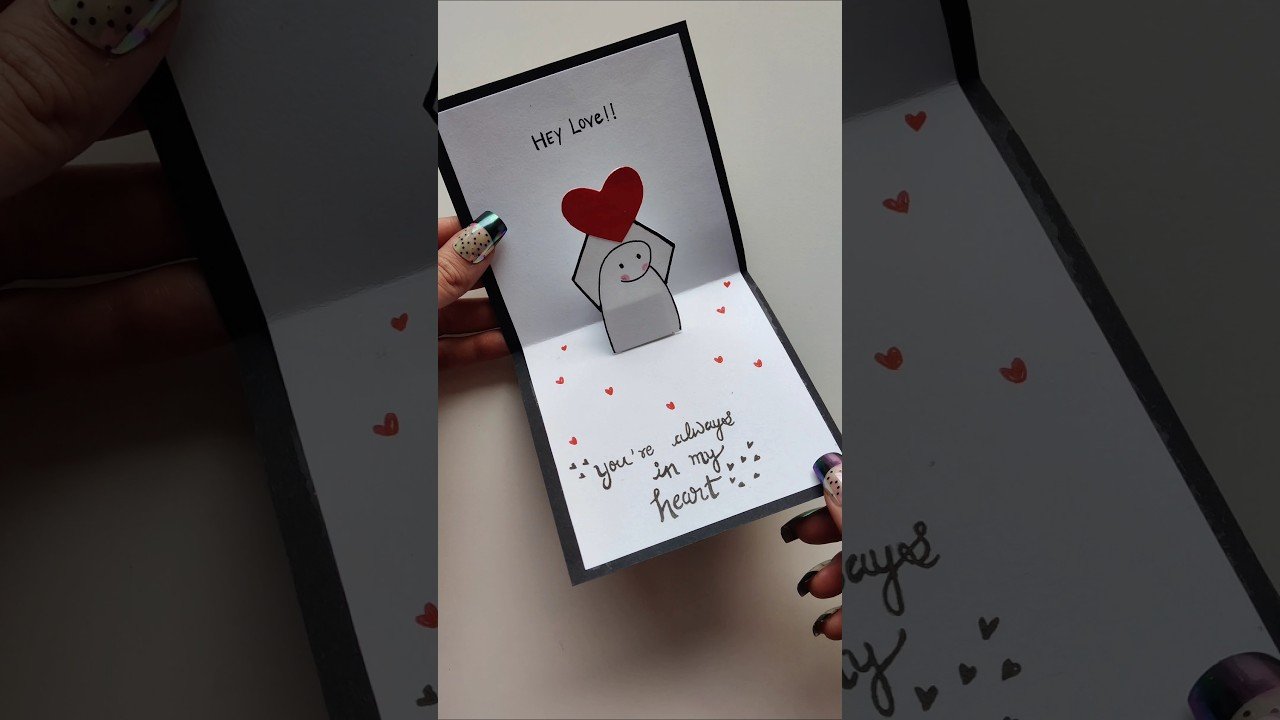
Cut a heart or other shape from construction paper for the pop-up element. Glue the shape onto the front of the pop-up tab, ensuring it folds flat. Decorate the front of the card with markers, stickers, or drawings. Write a personal Valentine's message inside the card using pens or markers. Add embellishments like glitter or ribbon to enhance the design. Ensure all glued parts are pressed firmly and aligned correctly. Let the glue dry completely before closing the card. Open and close the card gently to test the pop-up action. Trim any uneven edges for a clean finish. Add additional pop-up elements if desired using the same method. Use a ruler to keep folds and cuts straight and even. Avoid overloading the pop-up tab with heavy decorations. Store the card flat under a book if it curls while drying. Label the back of the card with your name and date if gifting. Use contrasting colors for better visual impact. Double-check the card opens and closes smoothly before gifting.
            Colored cardstock, Construction paper, Markers or pens, Stickers or embellishments
            Medium
            Use double-sided tape for cleaner attachment of pop-up elements., Sketch your design lightly in pencil before finalizing., Layer different paper textures for added depth and interest.
            45
            https://www.youtube.com/watch?v=mXzEBSpPyPQ
            "https://youtu.be/9n6em1ZBOvI?si=rWqitTC3UuZtYa7y" ​