I want to resurface linoleum countertops

Check out your helpful results below!
Jump to a section, or see what you’ll get:
Jump to:
Scroll for the full guide ↓
  • 🎥 A step-by-step video walkthrough
  • 🧰 A tools & supplies checklist
  • 📋 Clear step-by-step instructions
  • ⚠️ Safety notes + pro tips
  • 🧑‍🔧 Connections to local pros (if you want help)

Video

Don't Let This Be You

Estimated Time:

Difficulty:

Tools

    Materials

      Steps

        Safety Notes

          Pro Tips

            Did this tutorial help?

            Send me this Do It Yourself tutorial via email

            Need a pro

            Need a pro?

            Tell us what went wrong and we’ll connect you with a trusted local pro.

            Please enter your name.
            Enter a valid email.
            Enter a valid phone number.
            Enter your ZIP/postcode.
            Pick a trade.
            Tell us a bit about the issue.
            Image must be under 3 MB.
            By sending, you agree to our Terms and Privacy.
            Free quotes No spam Cancel anytime
            diy4uai21-20
            Orbital sander, Putty knife, Paint roller, Paint tray, Utility knife, Screwdriver, Painter's tape
            Wear gloves and a mask when sanding or using chemical cleaners., Ensure proper ventilation when applying coatings or sealers., Unplug any nearby electrical appliances before starting., Allow coatings to cure fully before using the surface.
            Clear the countertop of all items and remove any appliances or accessories. Clean the linoleum thoroughly using a degreaser to remove oils and residue. Use a screwdriver to remove any hardware or fixtures attached to the countertop. Protect walls and cabinets with painter’s tape and masking paper. Lay down drop cloths to protect the floor and surrounding areas. Use an orbital sander with 120-grit sandpaper to scuff the linoleum surface evenly. Wipe away sanding dust with a damp cloth and allow the surface to dry completely. Inspect the surface for gouges or seams and fill them with wood filler or epoxy putty. Let the filler dry fully, then sand smooth with 220-grit sandpaper. Vacuum and wipe down the surface again to remove all dust and debris. Pour the base coat into a paint tray and apply evenly using a roller. Allow the base coat to dry according to the product instructions. Apply the decorative or texture coat using the method provided in the kit. Let the decorative coat dry thoroughly before proceeding. 
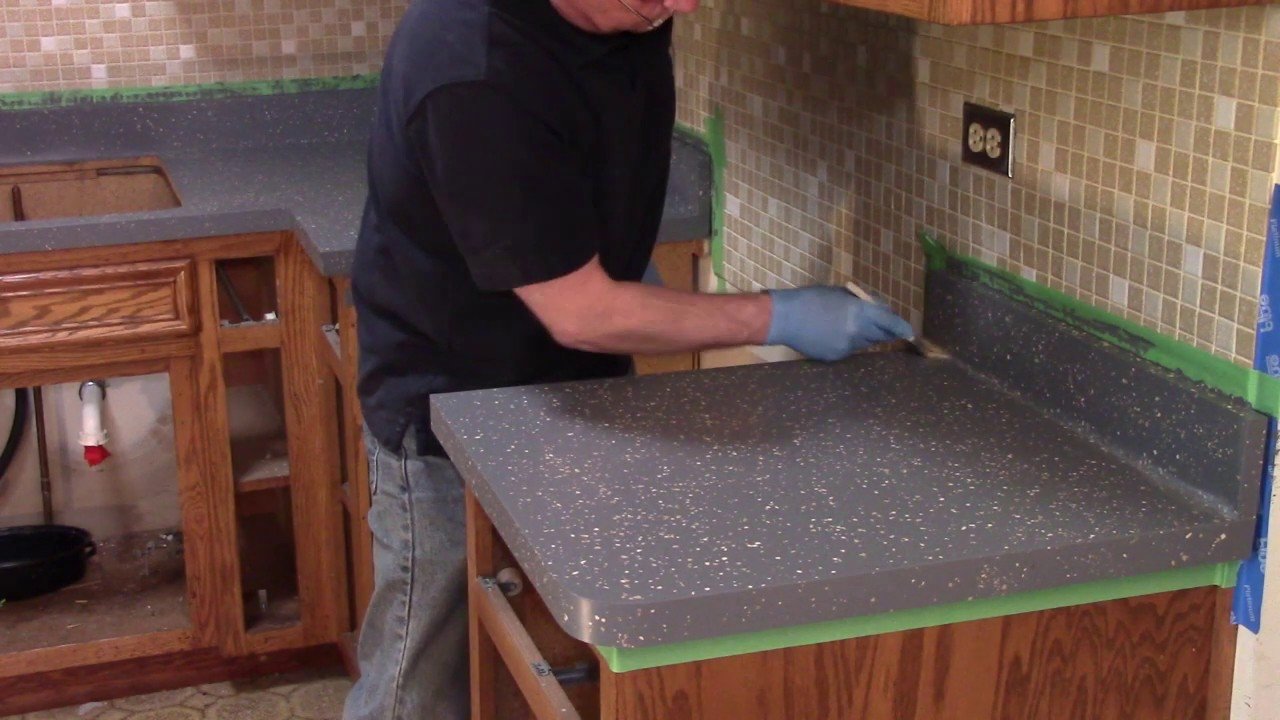
Apply the topcoat or sealer evenly to protect the new surface. Allow the topcoat to cure fully, following the manufacturer’s recommended time. Check for any missed spots and touch up if needed. Remove painter’s tape and masking paper carefully once the surface is dry. Reinstall any removed fixtures or hardware. Clean up the area and dispose of used materials safely.
            Countertop coating kit, Degreaser cleaner, Sandpaper (120 and 220 grit), Wood filler or epoxy putty, Drop cloths, Disposable gloves, Masking paper
            Medium
            Use a foam roller for a smoother finish on the topcoat., Test the coating on a small area first to check adhesion., Work in sections to maintain a wet edge and avoid lap marks., Label removed hardware to make reinstallation easier.
            360
            https://www.youtube.com/watch?v=kwdGDqwex2Q
            if( length(trim() > 0; trim(); "https://youtu.be/9n6em1ZBOvI?si=rWqitTC3UuZtYa7y" )