Turn off power to the AC unit at the breaker to ensure safety before starting any inspection.
Remove the air filter from the return vent and inspect it for dirt or clogs.
Replace the air filter if it appears dirty or clogged to improve airflow.
Check the thermostat settings to ensure it is set to 'cool' and the temperature is below room temperature.
Use a flashlight to inspect the indoor evaporator coil for dust or debris buildup.
Gently clean the evaporator coil with a vacuum or soft brush to remove dust.
Go outside and inspect the condenser unit for leaves, dirt, or debris blocking airflow.
Turn off power to the outdoor unit and use a garden hose to gently rinse the condenser fins from the inside out.
Check for ice buildup on the evaporator coil; if present, let it thaw completely before restarting.
Inspect the circuit breakers for the AC system and reset any that have tripped.
Ensure all supply and return vents are open and unblocked by furniture or curtains.
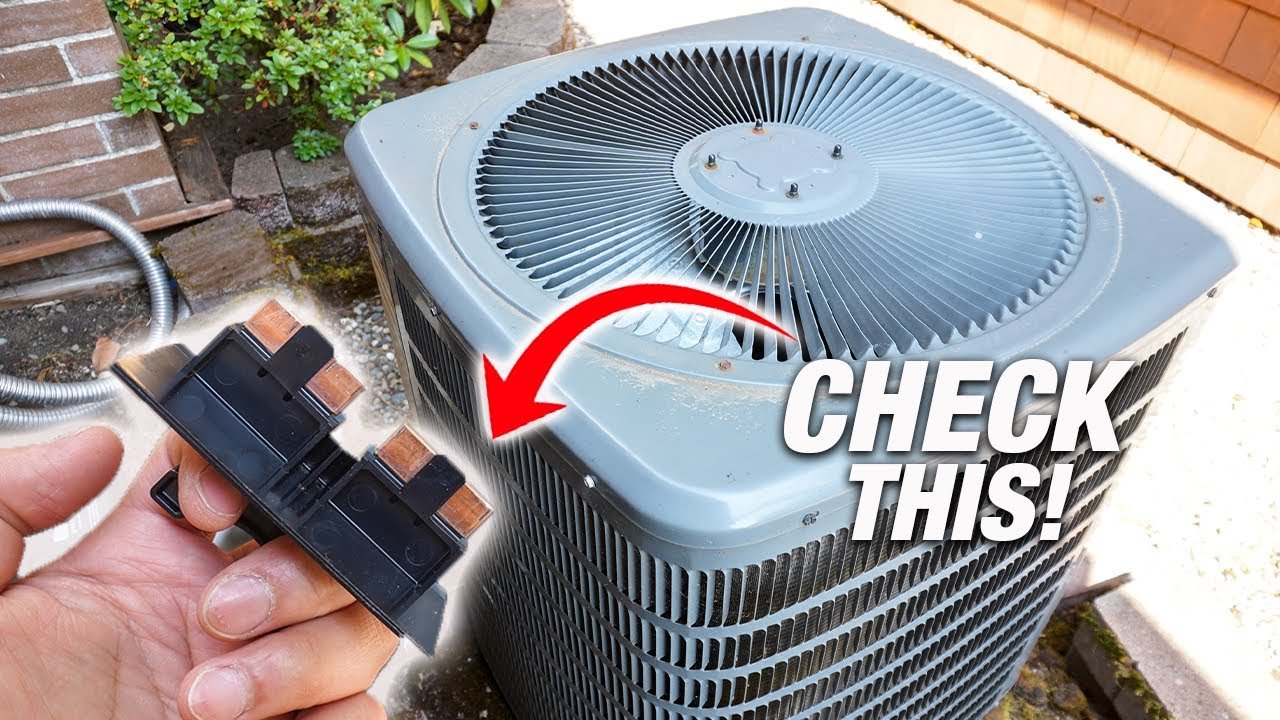
Use a multimeter to test the capacitor for proper voltage if the fan or compressor isn't running.
Check the fan blades for obstructions or damage and clear any debris.
Inspect the refrigerant lines for visible damage or leaks; do not attempt to recharge refrigerant yourself.
Look for signs of water leakage around the indoor unit that may indicate a clogged drain line.
Ensure the outdoor unit is level and stable to prevent compressor issues.
After all checks, restore power to the system at the breaker.
Set the thermostat to cooling mode and observe if the system begins to cool properly.
Listen for unusual noises that may indicate a failing component.
If the issue persists, contact a licensed HVAC technician for further diagnosis.