Wallpaper

Check out your helpful results below!
Jump to a section, or see what you’ll get:
Jump to:
Scroll for the full guide ↓
  • 🎥 A step-by-step video walkthrough
  • 🧰 A tools & supplies checklist
  • 📋 Clear step-by-step instructions
  • ⚠️ Safety notes + pro tips
  • 🧑‍🔧 Connections to local pros (if you want help)

Video

Don't Let This Be You

Estimated Time:

Difficulty:

Tools

    Materials

      Steps

        Safety Notes

          Pro Tips

            Did this tutorial help?

            Send me this Do It Yourself tutorial via email

            Need a pro

            Need a pro?

            Tell us what went wrong and we’ll connect you with a trusted local pro.

            Please enter your name.
            Enter a valid email.
            Enter a valid phone number.
            Enter your ZIP/postcode.
            Pick a trade.
            Tell us a bit about the issue.
            Image must be under 3 MB.
            By sending, you agree to our Terms and Privacy.
            Free quotes No spam Cancel anytime
            diy4uai21-20
            Wallpaper smoother, Utility knife, Measuring tape, Level, Seam roller, Sponge, Bucket, Straight edge, Ladder, Pencil
            Use a stable ladder when working at height., Keep utility knives sharp and cut away from your body., Ensure the room is well-ventilated when using adhesive or primer., Turn off power when working around electrical outlets.
            Clear the wall of nails, outlet covers, and debris before starting. Clean the wall with a damp sponge and let it dry completely. Apply a wallpaper primer/sealer to ensure proper adhesion. Measure the height of the wall and cut the first strip with 2 extra inches. Mark a vertical plumb line using a level to guide the first strip. If using unpasted wallpaper, apply adhesive evenly to the back. For pre-pasted wallpaper, soak the strip in water per manufacturer instructions. Fold the pasted strip onto itself (book it) and let it rest for the recommended time. Align the top of the strip with the ceiling and the edge with the plumb line. 
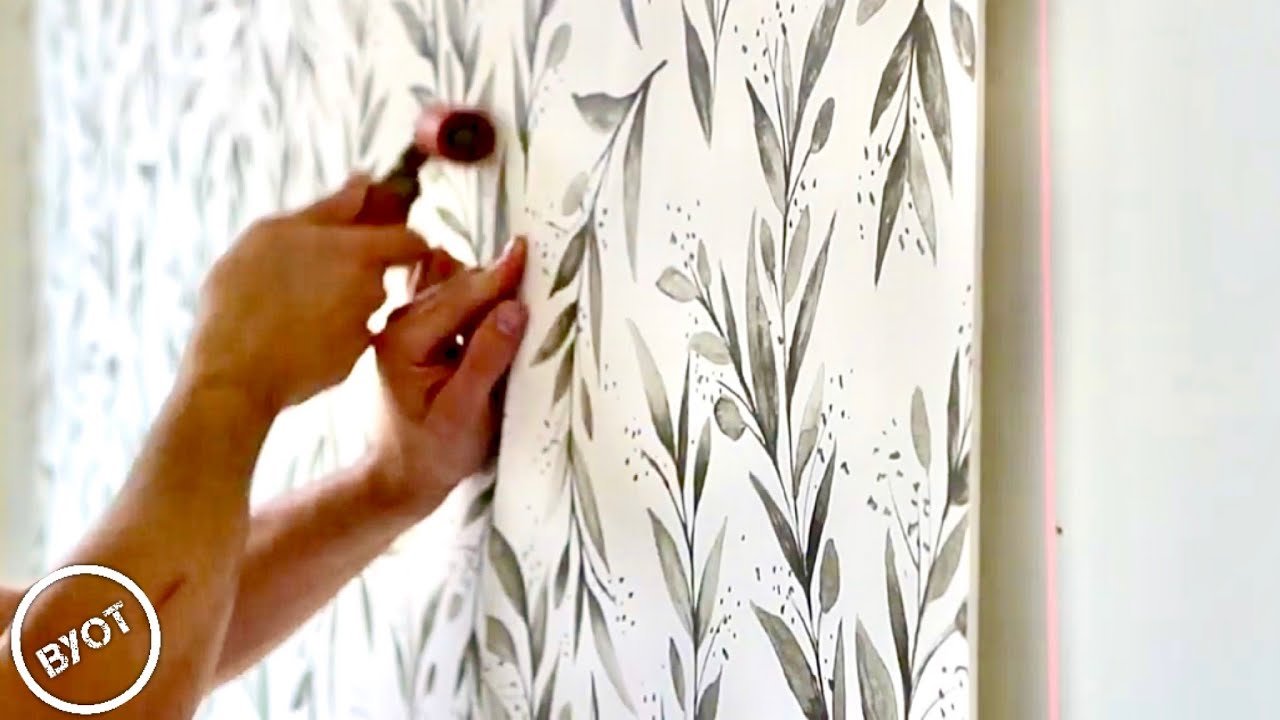
Smooth the strip from the center outward using a wallpaper smoother. Use a utility knife and straight edge to trim excess at the top and bottom. Wipe off any excess paste with a damp sponge immediately. Cut and align the next strip, matching the pattern carefully. Hang the second strip tightly against the first without overlapping. Smooth and trim the second strip as before. Use a seam roller to press down the seams for a tight bond. Repeat the process for all remaining strips, maintaining pattern alignment. Cut around outlets and switches carefully with a utility knife. Reinstall outlet covers and fixtures once wallpaper is dry. Allow wallpaper to dry completely before touching or cleaning.
            Wallpaper rolls, Wallpaper adhesive (if not pre-pasted), Drop cloth, Painter's tape, Primer/sealer
            Medium
            Always start hanging wallpaper from the most visible corner., Order extra wallpaper to account for pattern matching and mistakes., Use a damp sponge frequently to prevent paste from drying on the surface., Label cut strips in order to avoid confusion during installation.
            240
            https://www.youtube.com/watch?v=cV73f4Ywa04
            if( length(trim() > 0; trim(); "https://youtu.be/9n6em1ZBOvI?si=rWqitTC3UuZtYa7y" )