DIY Scented Candles in Mason Jars

Check out your helpful results below!
Jump to a section, or see what you’ll get:
Jump to:
Scroll for the full guide ↓
  • 🎥 A step-by-step video walkthrough
  • 🧰 A tools & supplies checklist
  • 📋 Clear step-by-step instructions
  • ⚠️ Safety notes + pro tips
  • 🧑‍🔧 Connections to local pros (if you want help)

Video

Don't Let This Be You

Estimated Time:

Difficulty:

Tools

    Materials

      Steps

        Safety Notes

          Pro Tips

            Did this tutorial help?

            Send me this Do It Yourself tutorial via email

            Need a pro

            Need a pro?

            Tell us what went wrong and we’ll connect you with a trusted local pro.

            Please enter your name.
            Enter a valid email.
            Enter a valid phone number.
            Enter your ZIP/postcode.
            Pick a trade.
            Tell us a bit about the issue.
            Image must be under 3 MB.
            By sending, you agree to our Terms and Privacy.
            Free quotes No spam Cancel anytime
            diy4uai21-20
            Double boiler or microwave-safe container, Thermometer, Hot glue gun, Scissors, Wooden stir stick
            Always monitor wax temperature to avoid overheating or combustion., Use heat-resistant containers and surfaces when working with hot wax., Never leave melting wax or burning candles unattended., Keep children and pets away from hot wax and tools., Ensure proper ventilation when using fragrance oils.
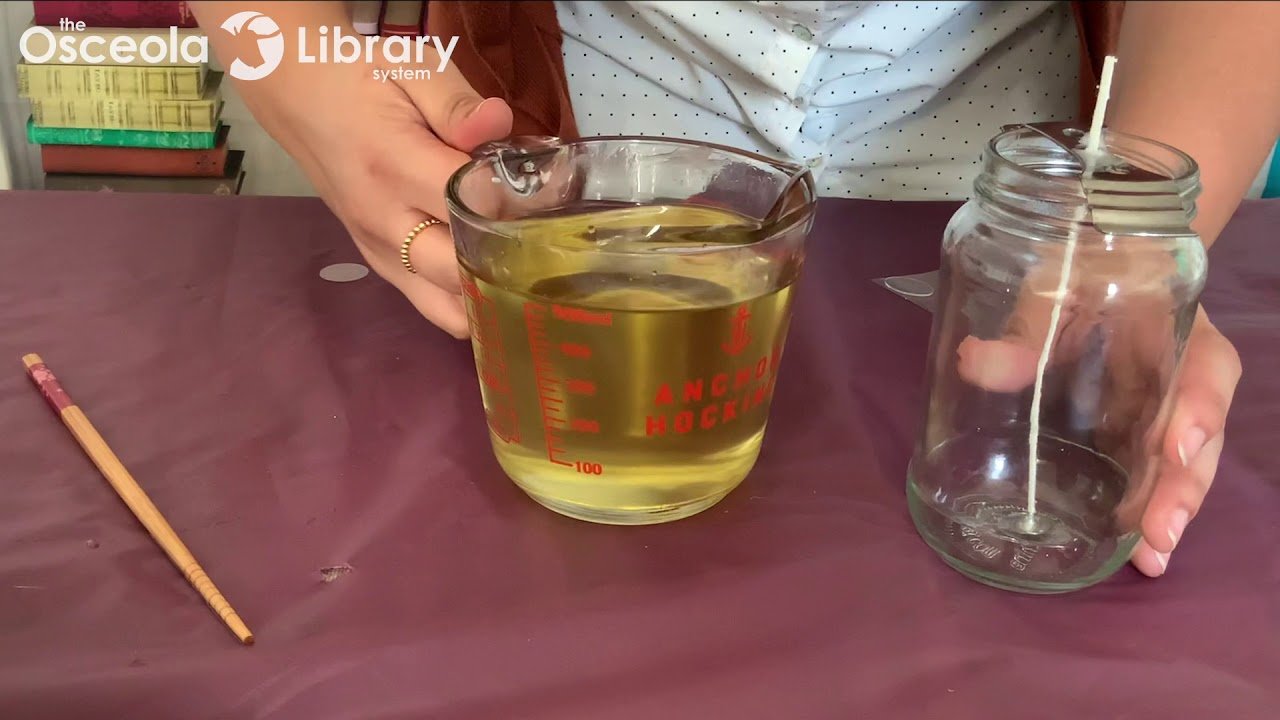
            Clean and dry the mason jars thoroughly to ensure no dust or moisture remains. Use a hot glue gun to secure the metal base of the wick to the center of the jar bottom. Place soy wax flakes into a double boiler or microwave-safe container. Heat the wax slowly over medium heat or in the microwave in 30-second intervals until fully melted. Use a thermometer to monitor the wax temperature, aiming for around 170°F before adding fragrance. Add the desired amount of fragrance oil to the melted wax and stir gently to combine. If using dye chips, add them now and stir until fully dissolved for even color. Stir the wax thoroughly for about 1–2 minutes to ensure even distribution of scent and color. Carefully pour the melted wax into the prepared mason jars, leaving about 1/2 inch at the top. Use a wick centering device or chopsticks to keep the wick upright and centered as the wax cools. Allow the candles to cool and harden completely at room temperature for several hours or overnight. Once cooled, trim the wick to about 1/4 inch above the wax surface for optimal burning. Wipe any wax drips from the outside of the jars with a damp cloth. Label your candles with the scent name and date if desired. Store candles in a cool, dry place until ready to use or gift. Burn the candle in a draft-free area on a heat-resistant surface. Never leave a burning candle unattended or near flammable materials. Test burn one candle to ensure proper wick performance and scent throw. Recycle leftover wax by remelting and pouring into a new container. Enjoy your handmade scented candles or give them as thoughtful gifts.
            Soy wax flakes, Fragrance oil, Cotton candle wicks, Mason jars, Wick centering device or chopsticks, Optional dye chips
            Medium
            Pre-warm jars slightly to reduce frosting on cooled wax., Use a kitchen scale for accurate wax and fragrance measurements., Let candles cure for 48 hours before burning for best scent throw., Use a wick size appropriate for the jar diameter., Test different fragrance oil percentages to find your preferred strength.
            90
            https://www.youtube.com/watch?v=0pqimQlf8tQ
            if( length(trim() > 0; trim(); "https://youtu.be/9n6em1ZBOvI?si=rWqitTC3UuZtYa7y" )